You want your customer to choose their order type at the first step. Instead of at the end of the checkout process.
What this means
You can let your customer choose up front, whether their order is going to be a:
- pre-paid reservation, or
- self-pickup order, or
- delivery order
This also means you can have different menus and prices for dine-in and non-dine-in orders! (You can manage this in your Items tab.)

How to
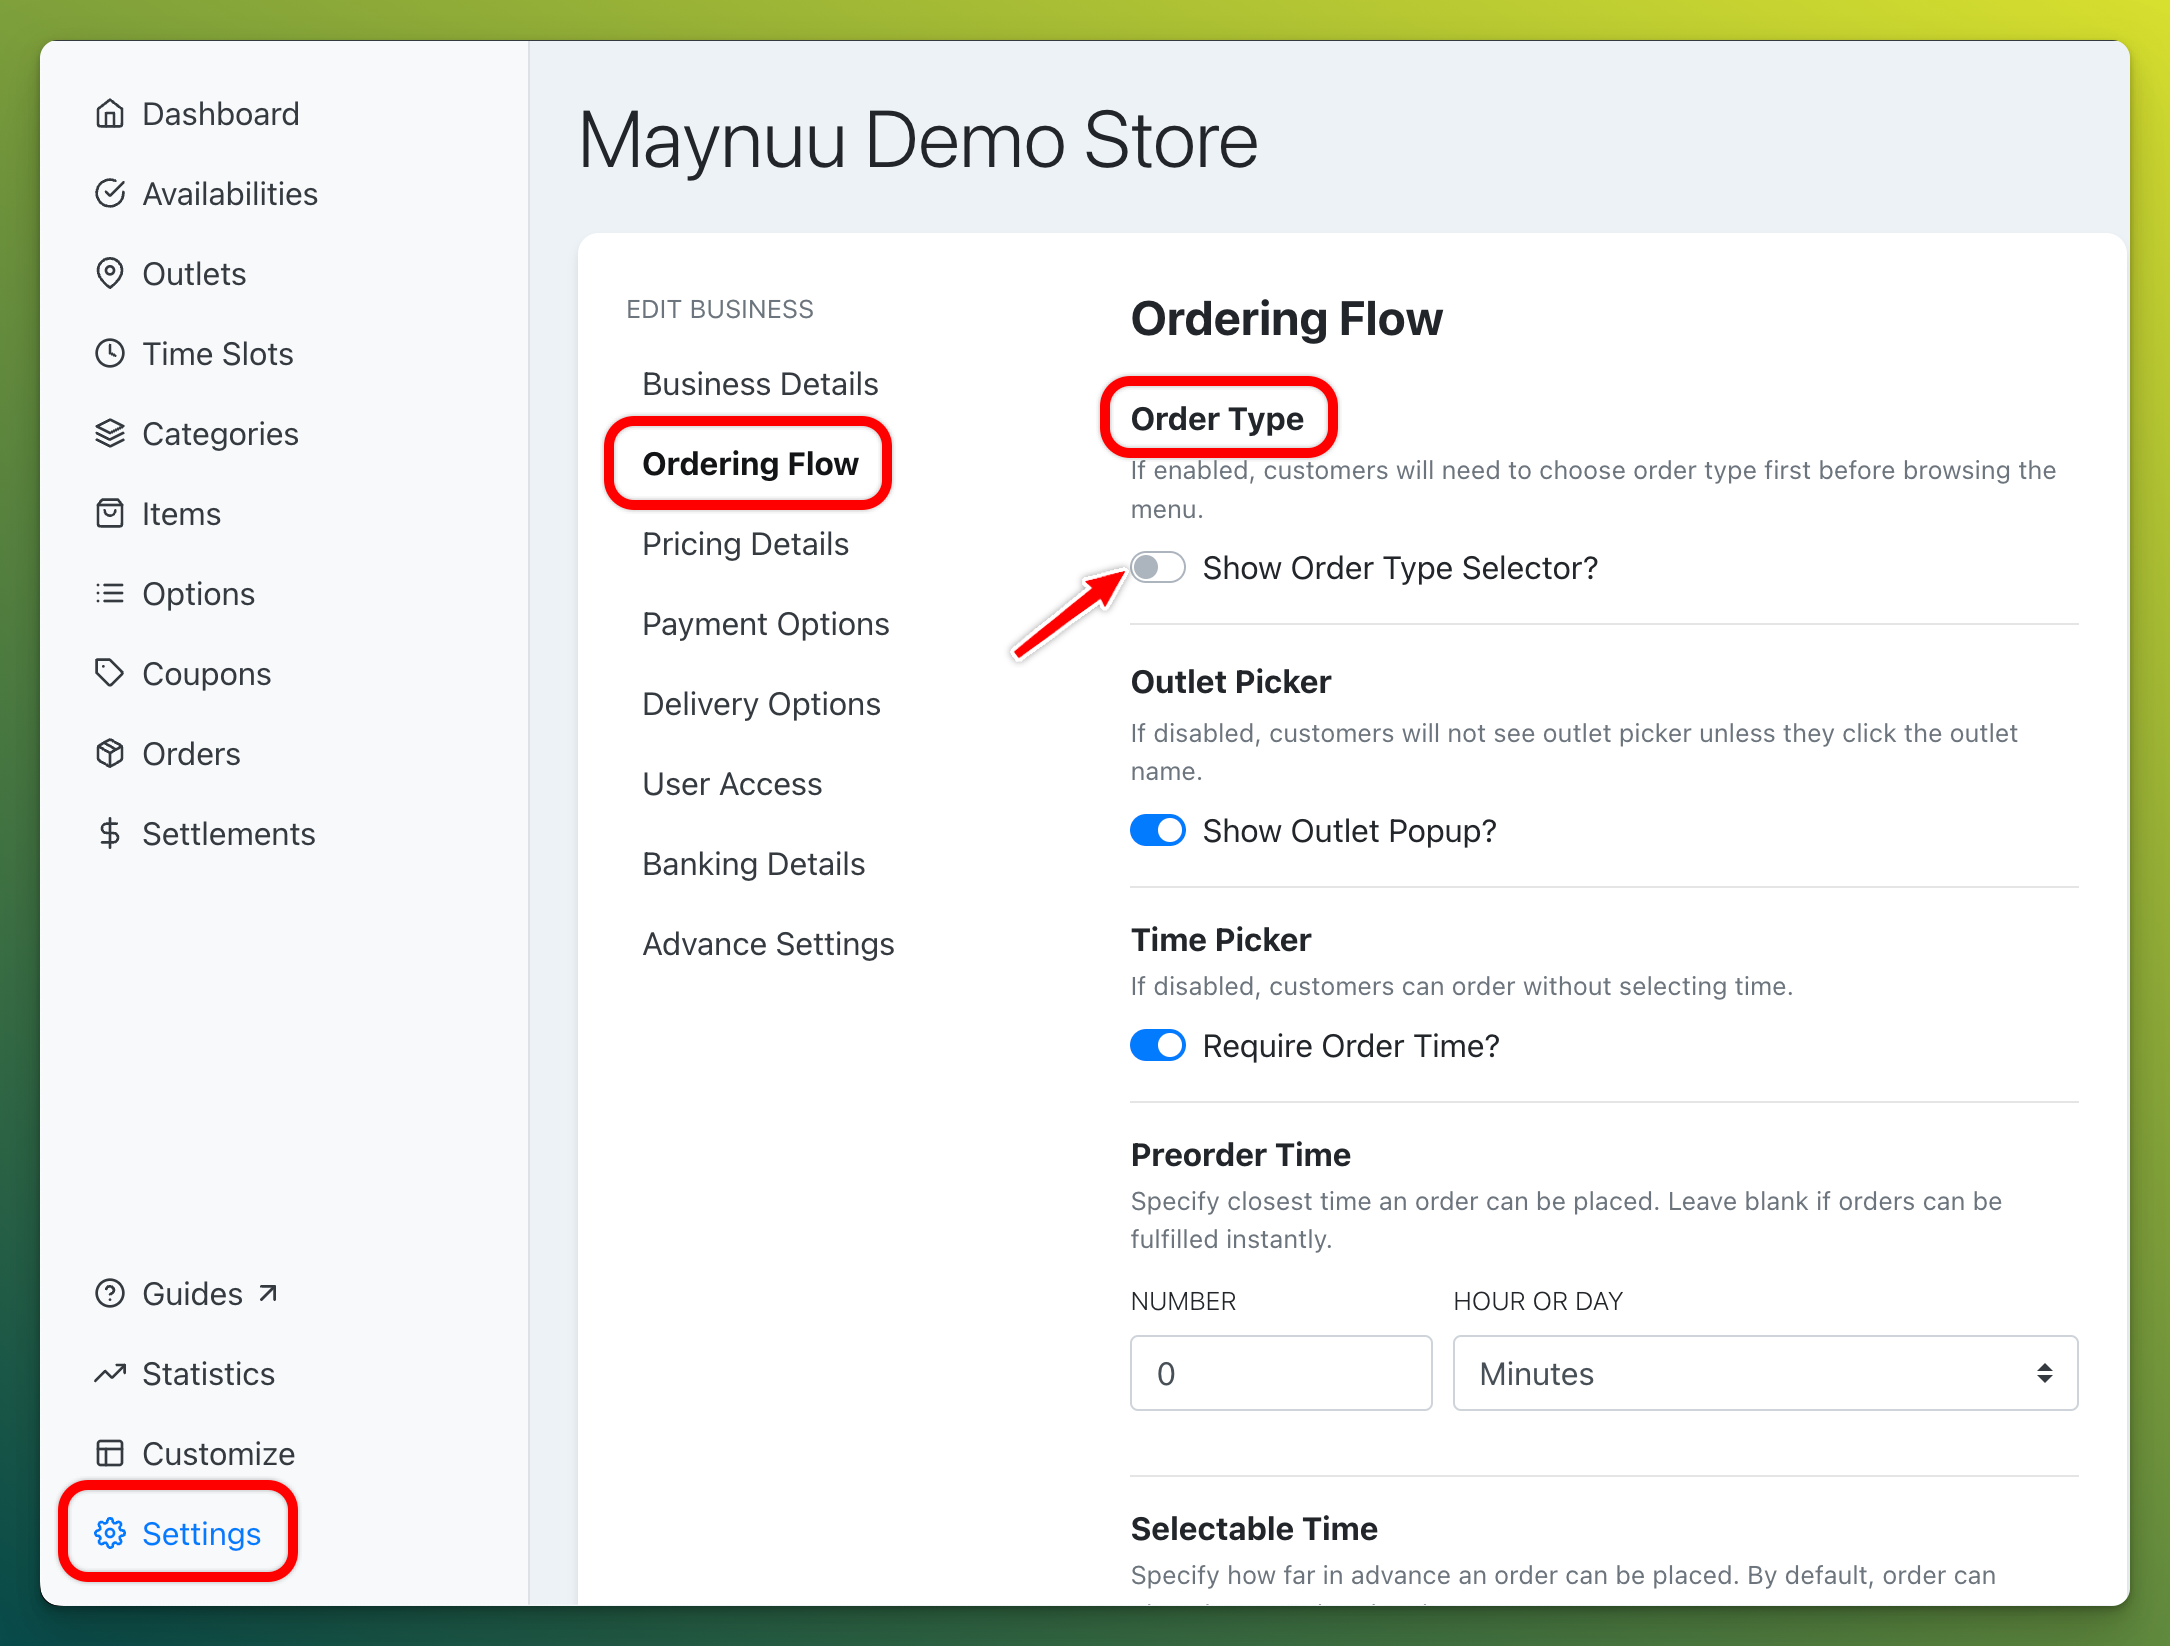
- To enable this, go to your dashboard: Settings > Ordering Flow > Order Type
- Switch on 'Show Order Type Selector?'
- Scroll to the bottom and click the 'Update' button
What happens now?
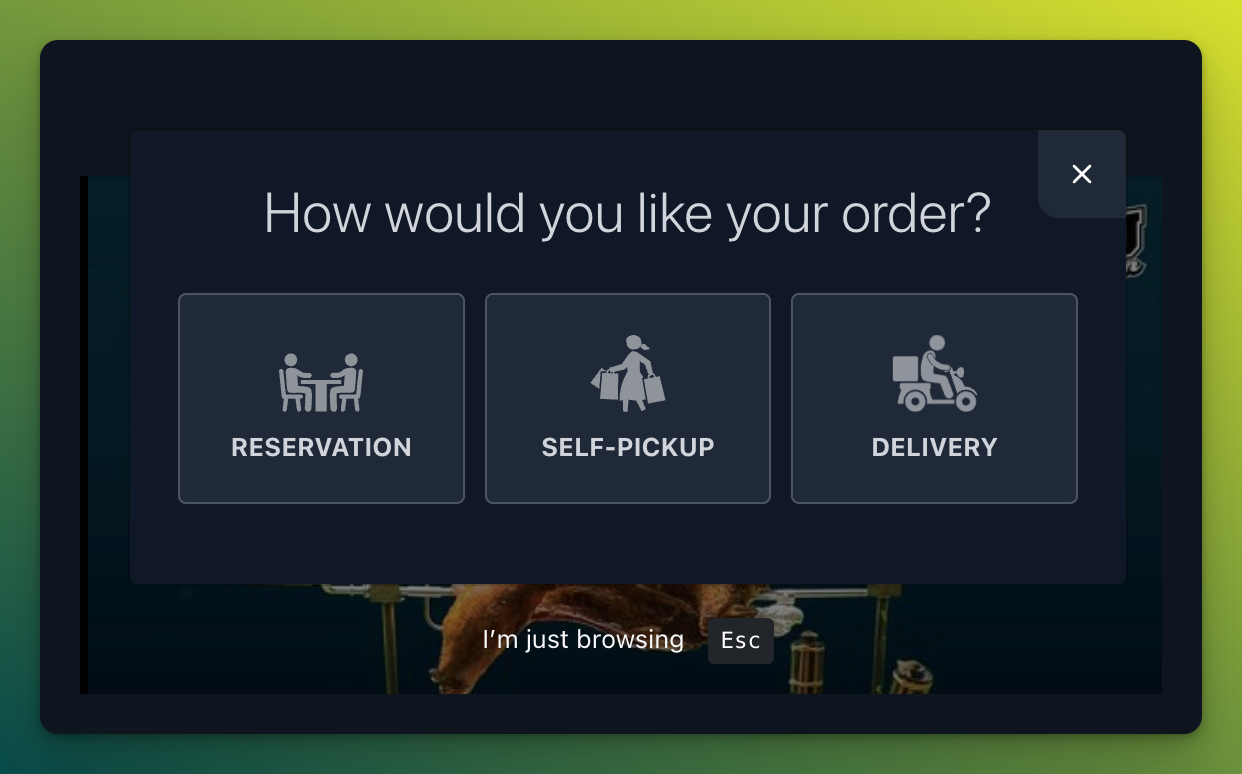
Refresh your web page.
This is what the customer should see when they visit your ordering site.
They can now choose up front whether their order is going to be a reservation, self-pickup or delivery.
Note: Your ordering site may look different, if, for example, you do not accept Reservations.
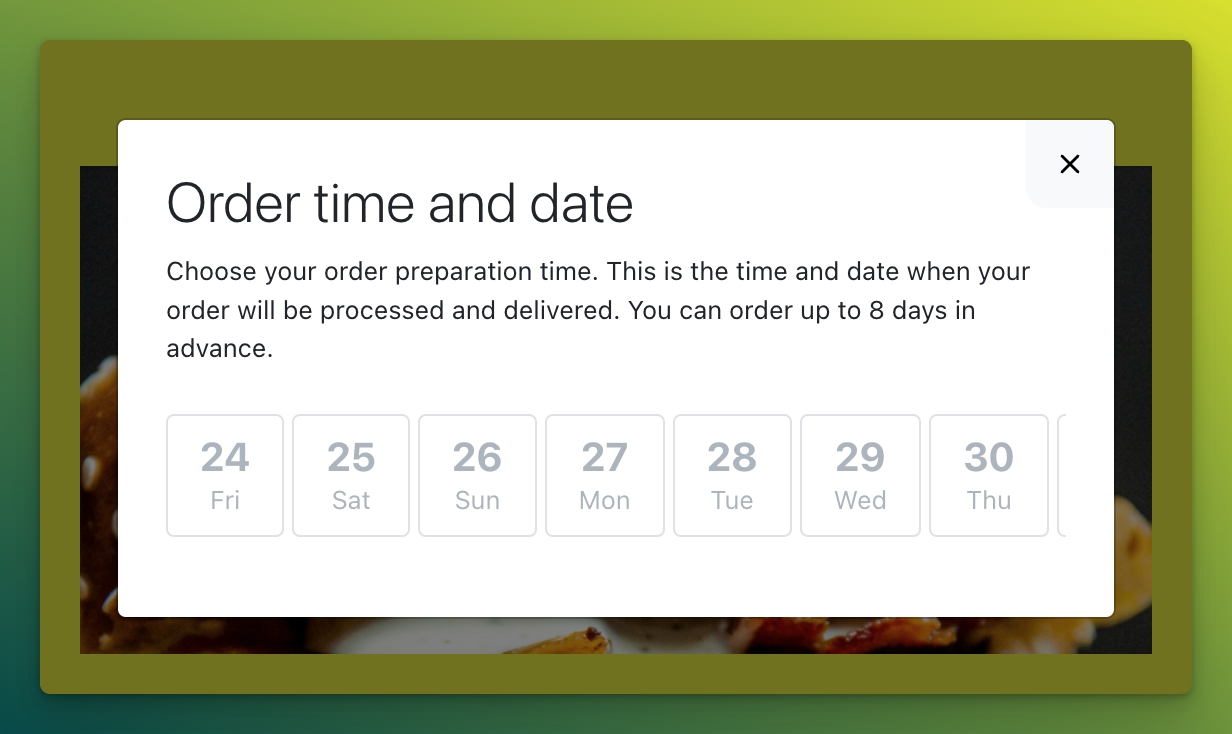
Uh oh! Why customer cannot select 'Order time and date'?
After your customer selects their order type, they need to select a date and time.
You may notice at this point that your order dates might be greyed out and are not clickable.
Solution
The final step is to fill in your catalog type in the following sections:
- Time Slots
- Categories
- Items
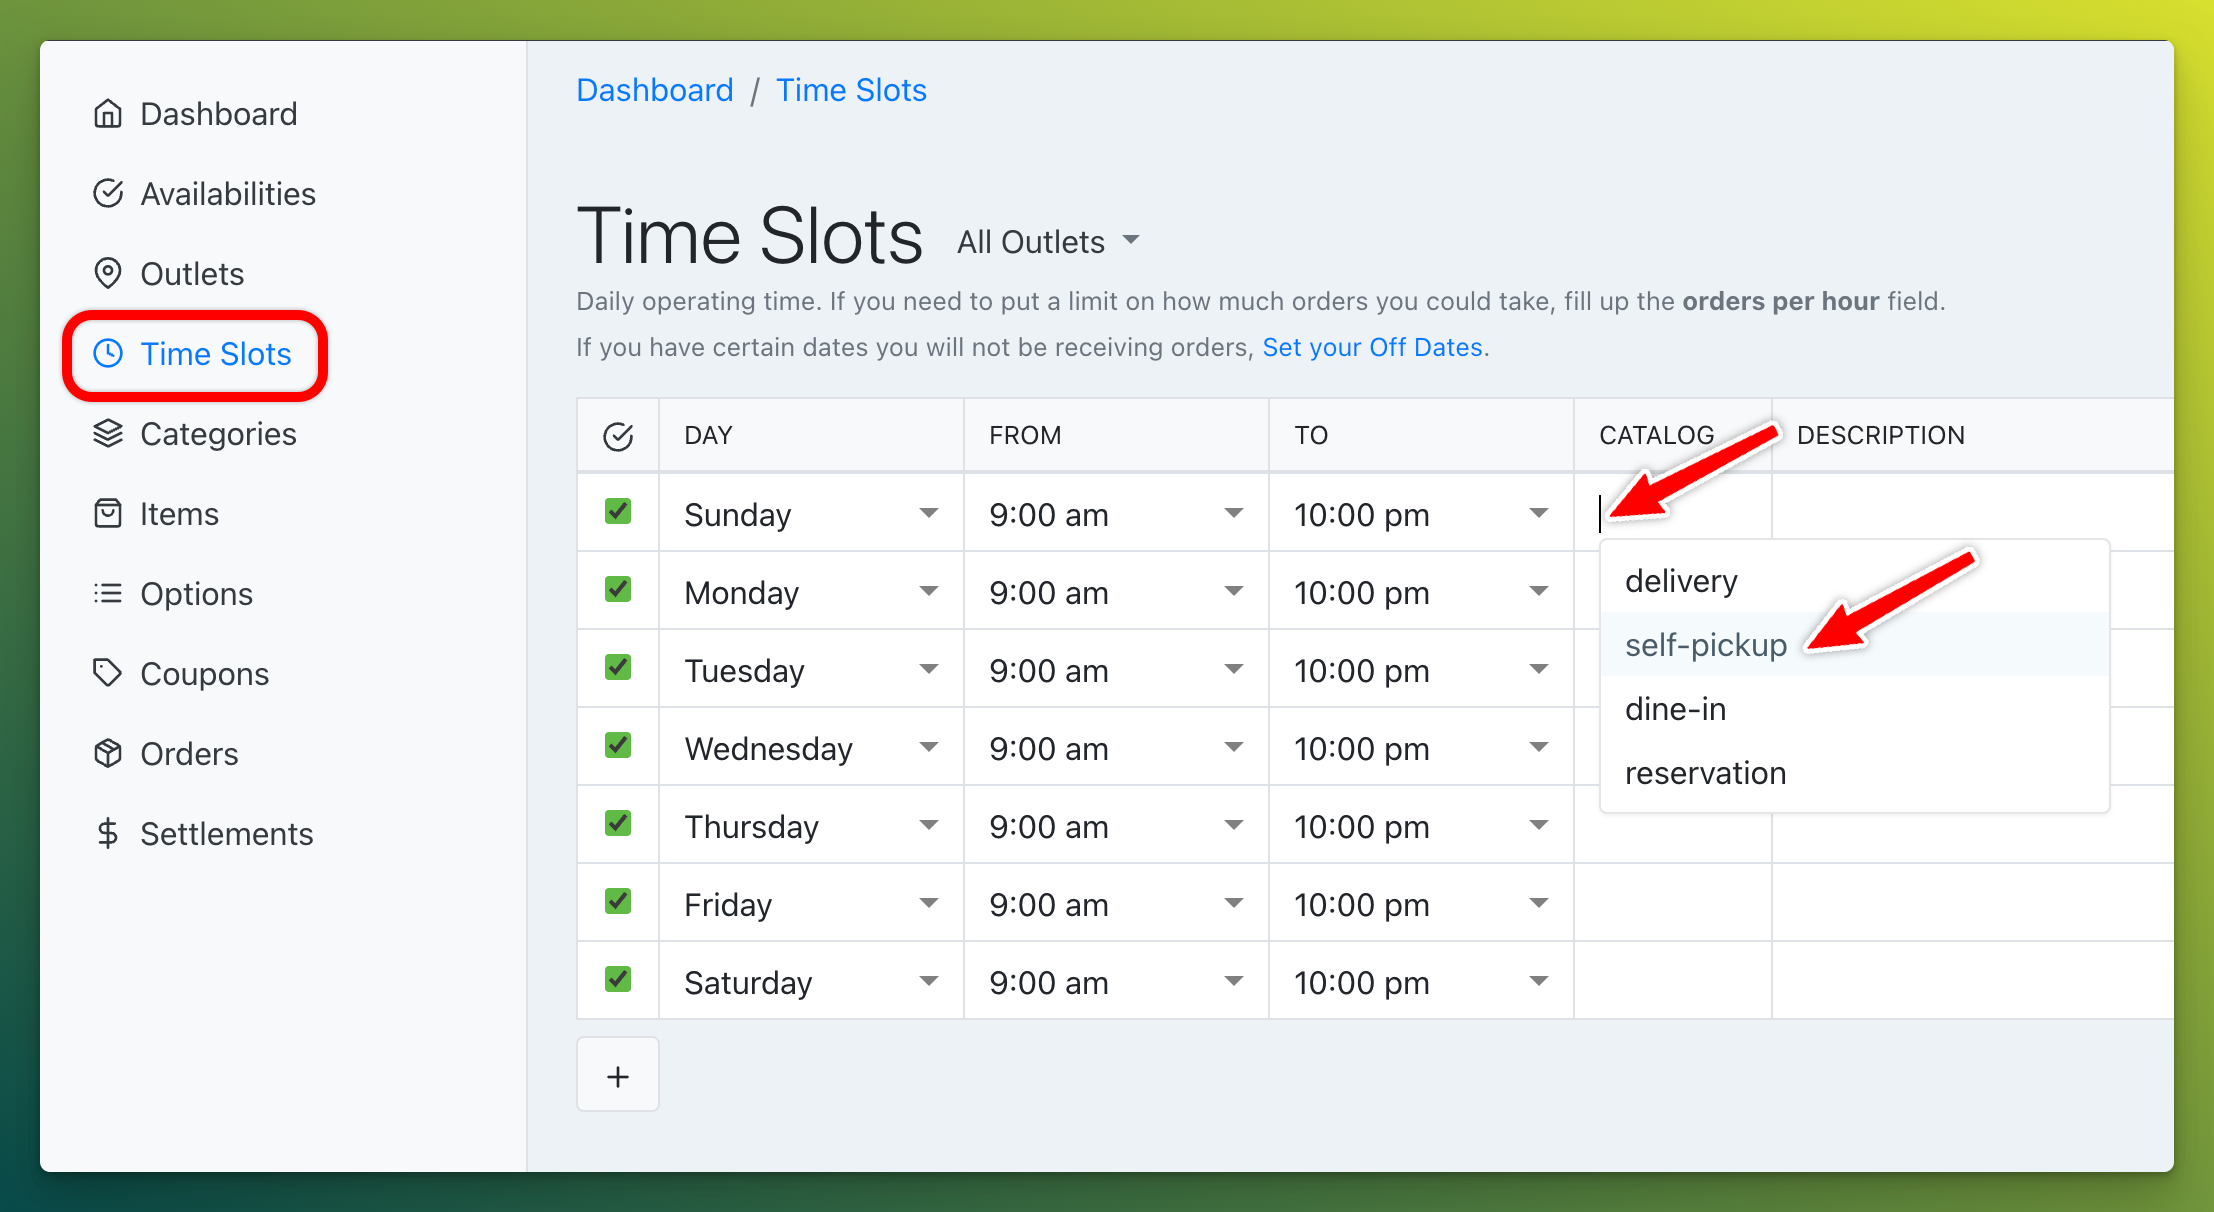
Time Slots
Each time slot must belong to at least one catalog type.
Example: Let's say your ordering site only accepts delivery and self-pickup orders. Make sure you select delivery and self-pickup for all your operating time slots.
- Click anywhere in the empty Catalog cell
- A drop-down list will appear
- Make your selection(s) by clicking on the appropriate catalog name(s)
To undo a selection, hit the 'Delete' or 'Backspace' key on your keyboard.
Click the 'Update Time Slots' button at the bottom of the screen to save your selections.
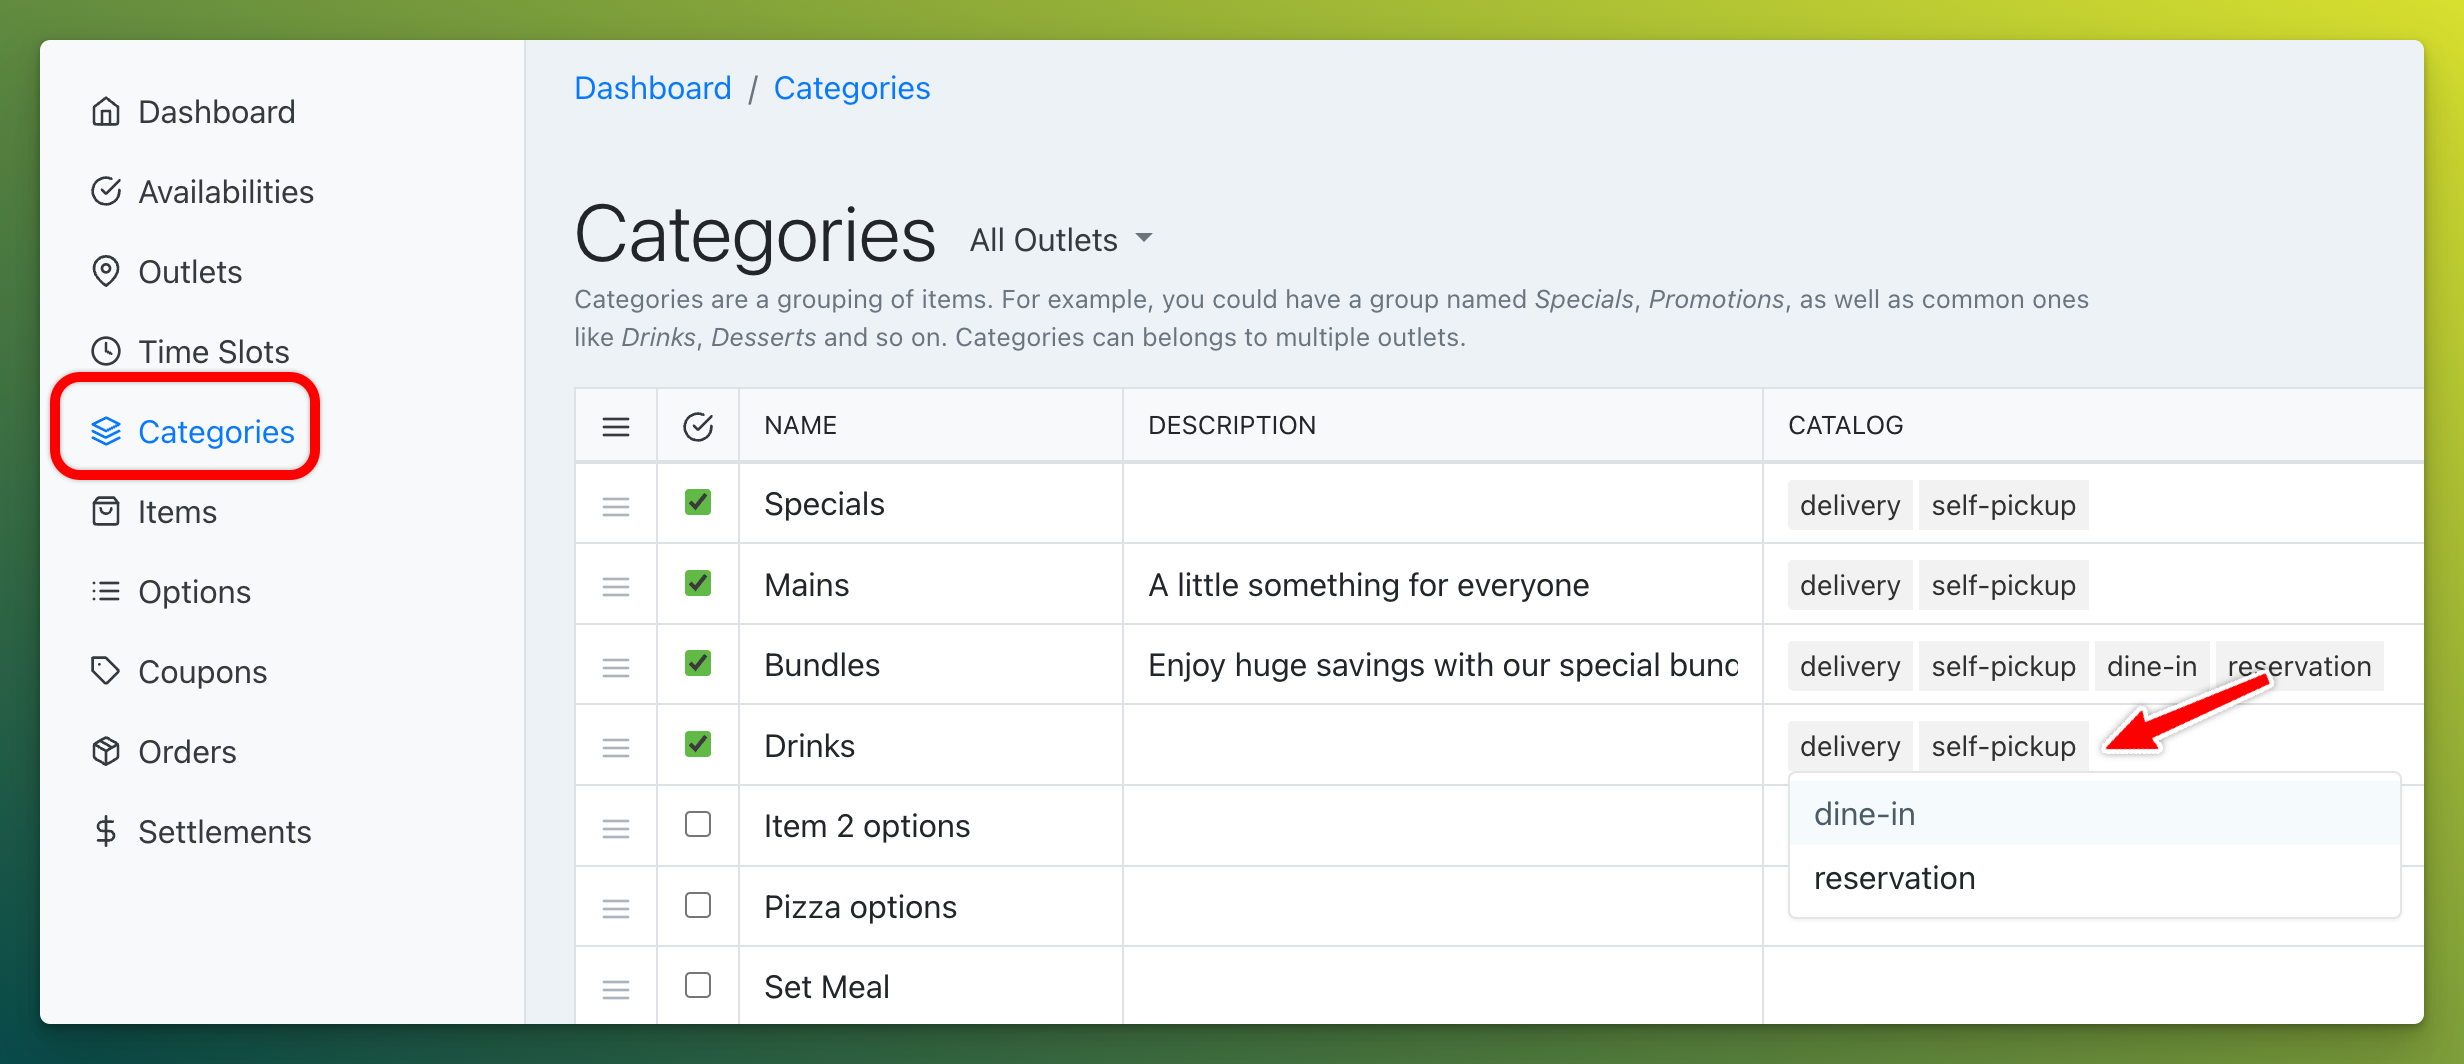
Categories
Each menu category must belong to at least one catalog type. Same steps as above.
Click the 'Update Categories' button at the bottom of the screen when you're done.
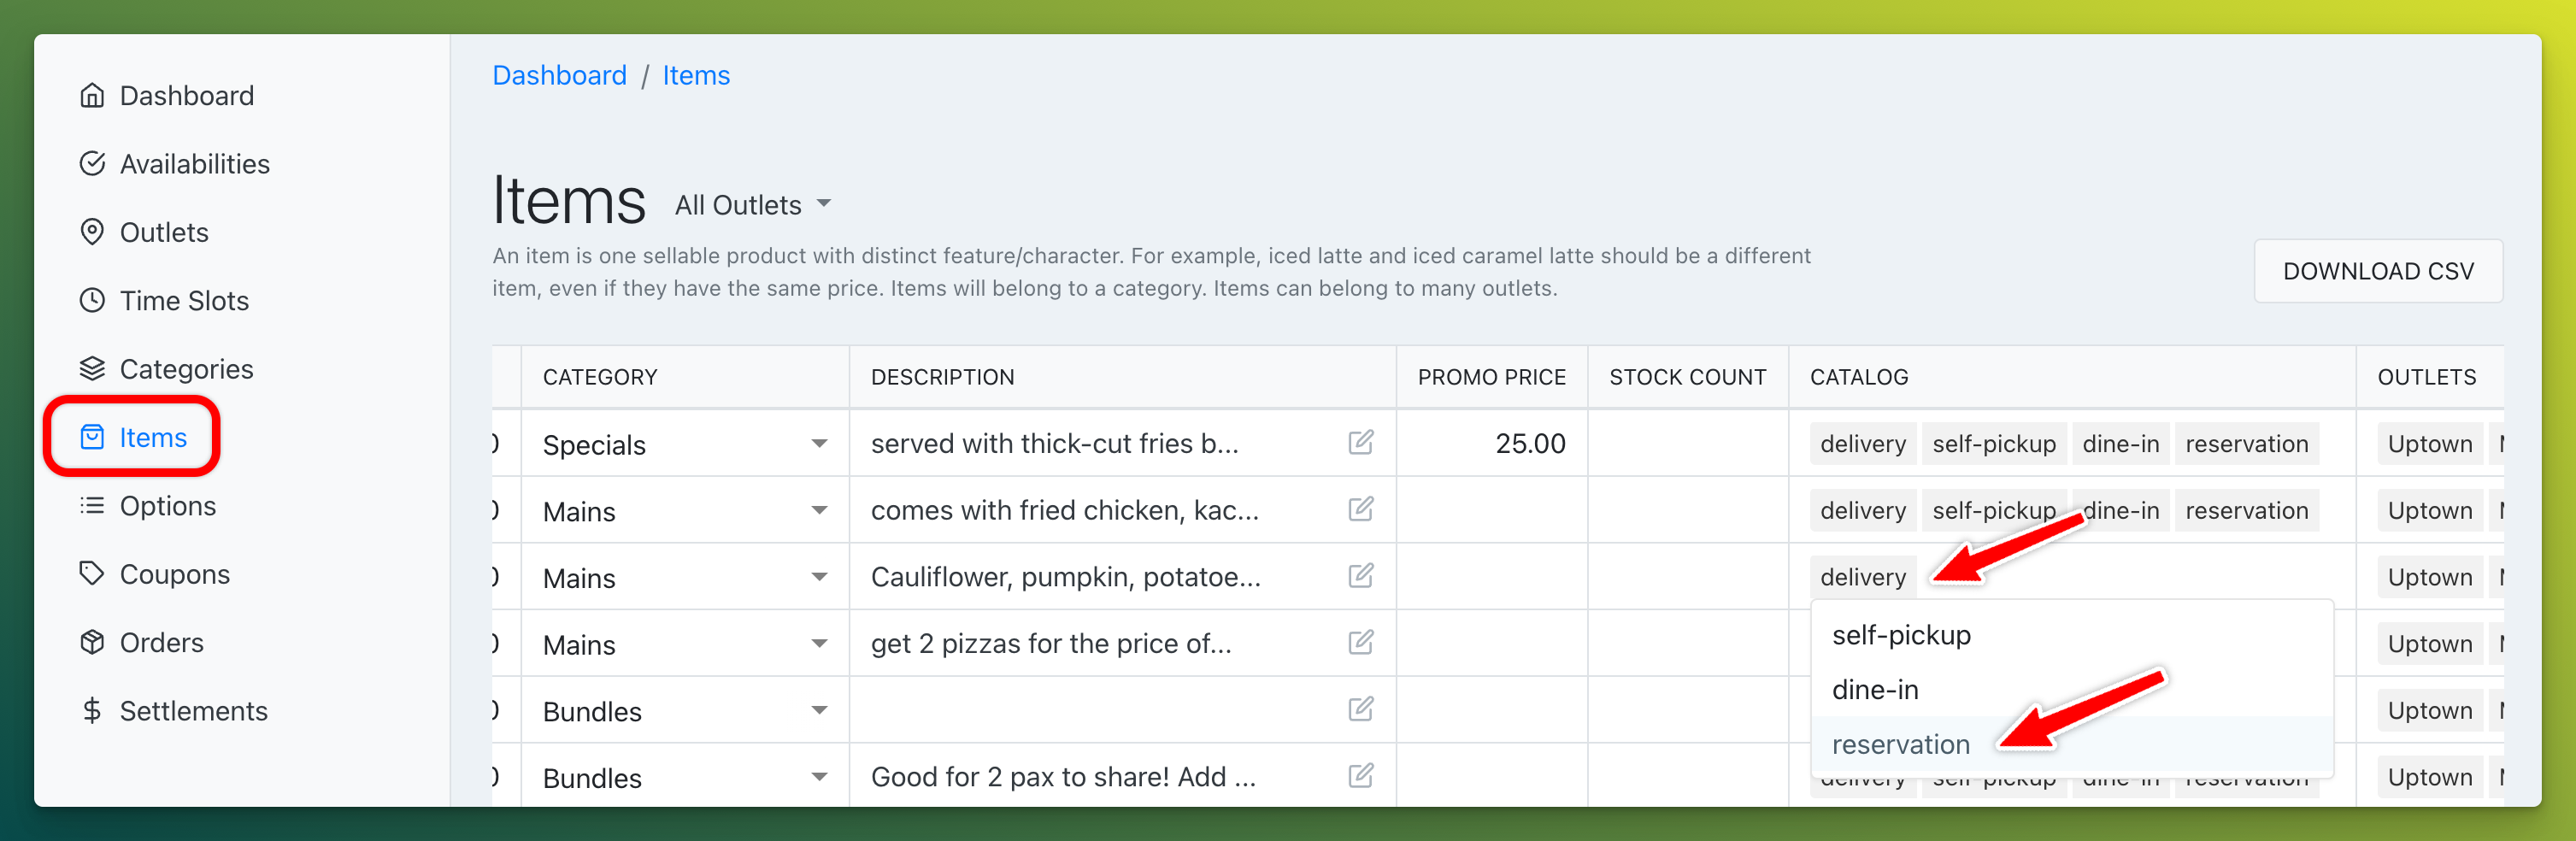
Items
Each menu item must belong to at least one catalog type. Repeat the same steps.
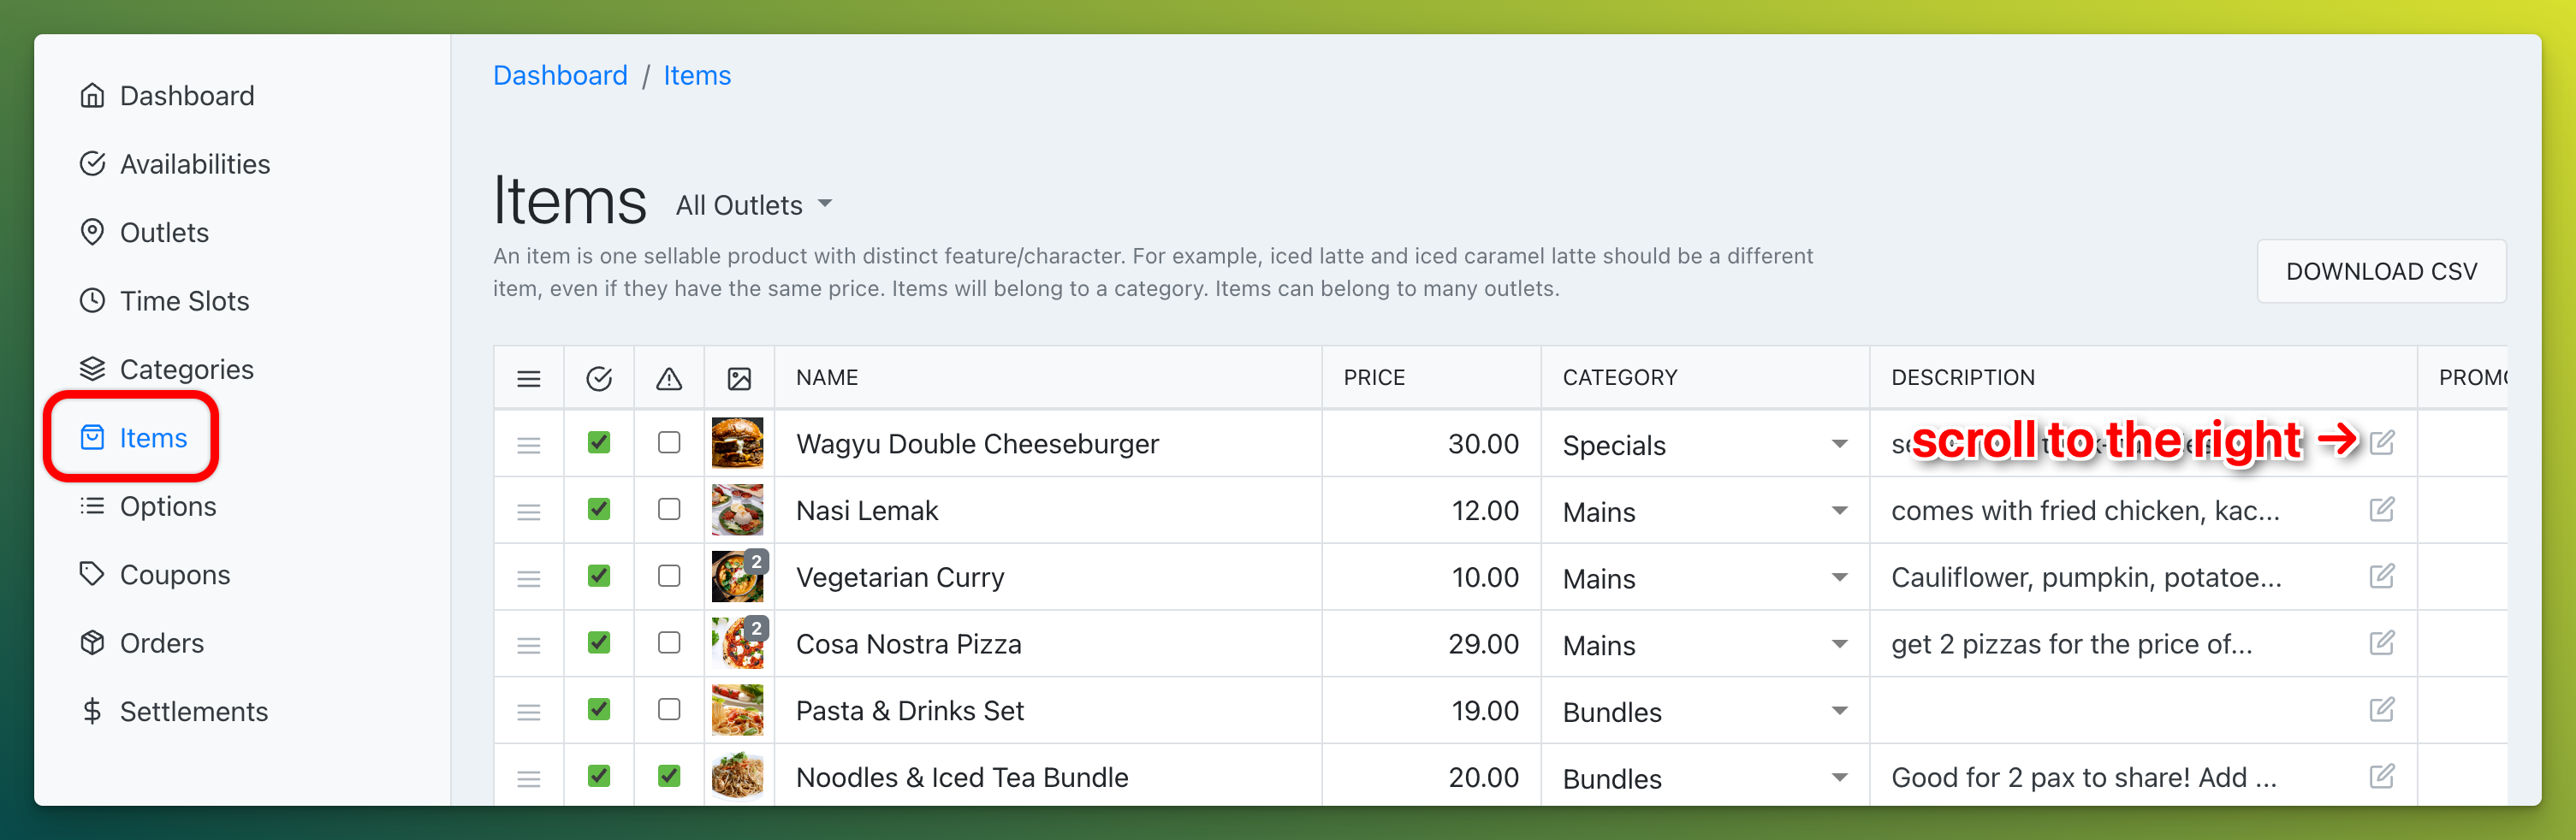
Remember to click the 'Update Items' button at the bottom of the screen.
Conclusion
Once you have completed the above steps, your customer will be able to choose the order date and time.